libnet/send_an_arp_request.c
接下來終於要送出封包啦,libnet的建構方式都是固定的,一個原則:封包要由上往下封裝,一般書上都會說封包是由上往下封裝,的確啦,可是如果是要自己寫封包,順序其實沒關係,不過libnet是由上往下。
| libnet_init():初始化 ↓ |
| libnet_build_arp()或libnet_autobuild_arp():建構ARP表頭 ↓ |
| libnet_build_ethernet()或libnet_autobuild_ethernet():建構Ethernet表頭 ↓ |
| libnet_write():送出封包 ↓ |
| libnet_destroy():釋放資源 |
建構封包主要就是這樣順序,因為還是入門,所以先不用有標記auto的函數。
Source Code
//
//  send_an_arp_request.c
//  功能:送出一個ARP Request封包。
//  Created by 聲華 陳 on 2016/01/22.
//

#include <stdio.h>
#include <stdlib.h>
#include <libnet.h>

u_int8_t *mac_aton(char *mac_address);

int main(int argc, const char * argv[]) {

    libnet_t *handle = NULL;
    char errbuf[LIBNET_ERRBUF_SIZE];
    libnet_ptag_t tag;
    u_int32_t source_ip, destination_ip;
    int length;

    if(argc != 3) {
        fprintf(stderr, "Usage: %s <Interface> <IP Address>\n", argv[0]);
        exit(1);
    }//end if


    handle = libnet_init(LIBNET_LINK, argv[1], errbuf);
    if(!handle) {
        fprintf(stderr, "libnet_init: %s\n", errbuf);
        exit(1);
    }//end if

    //ip address
    source_ip = libnet_get_ipaddr4(handle); // my ip address
    if(1 != inet_pton(AF_INET, argv[2], &destination_ip)) {
        fprintf(stderr, "Invalid IP address: %s", argv[2]);
        libnet_destroy(handle);
        exit(1);
    }//end if

    tag = libnet_build_arp(ARPHRD_ETHER,
                           //hardware type, 1
                           ETHERTYPE_IP,
                           //protocol type, 0x0800
                           ETHER_ADDR_LEN,
                           //hardware length, 6
                           4,
                           //protocol length
                           ARPOP_REQUEST,
                           //arp operation, 1
                           (const u_int8_t *)libnet_get_hwaddr(handle),
                           //source hardware address, my mac address
                           (const u_int8_t *)&source_ip,
                           //source protocol address
                           mac_aton("0:0:0:0:0:0"),
                           //target hardware address
                           (const u_int8_t *)&destination_ip,
                           //target protocol address
                           NULL,
                           0,
                           handle,
                           LIBNET_PTAG_INITIALIZER);
    if(tag == -1) {
        fprintf(stderr, "libnet_build_arp: %s\n", libnet_geterror(handle));
        libnet_destroy(handle);
        exit(1);
    }//end if

    tag = libnet_build_ethernet(mac_aton("ff:ff:ff:ff:ff:ff"),
                                //destination mac address
                                (const u_int8_t *)libnet_get_hwaddr(handle),
                                //source mac address, my mac address
                                ETHERTYPE_ARP,
                                //type
                                NULL,
                                0,
                                handle,
                                LIBNET_PTAG_INITIALIZER);
    if(tag == -1) {
        fprintf(stderr, "libnet_build_ethernet: %s\n", libnet_geterror(handle));
        libnet_destroy(handle);
        exit(1);
    }//end if

    length = libnet_write(handle);
    if(length == -1) {
        fprintf(stderr, "libnet_write: %s\n", libnet_geterror(handle));
    }//end if
    else {
        printf("Sent: %d byte%c\n", length, length <= 1 ? '\0' : 's');
    }//end else

    //free
    libnet_destroy(handle);

    return 0;
}

u_int8_t *mac_aton(char *mac_address) {
#define FUNCTION_BUFFER 256
    static u_char buffer[FUNCTION_BUFFER][ETHER_ADDR_LEN];
    static int which = -1;
    u_char *temp = NULL;
    int len;
    which = (which + 1 == FUNCTION_BUFFER ? 0 : which + 1);

    memset(buffer[which], 0, sizeof(buffer[which]));

    temp = libnet_hex_aton(mac_address, &len);
    if(!temp) {
        fprintf(stderr, "libnet_hex_aton: error\n");
        exit(1);
    }//end if

    //length is not 6
    if(len != ETHER_ADDR_LEN) {
        free(temp);
        fprintf(stderr, "libnet_hex_aton: length: %d\n", len);
        exit(1);
    }//end if

    memcpy(buffer[which], temp, sizeof(buffer[which]));
    free(temp);

    return buffer[which];
}//mac_aton
Xcode Pass Arguments
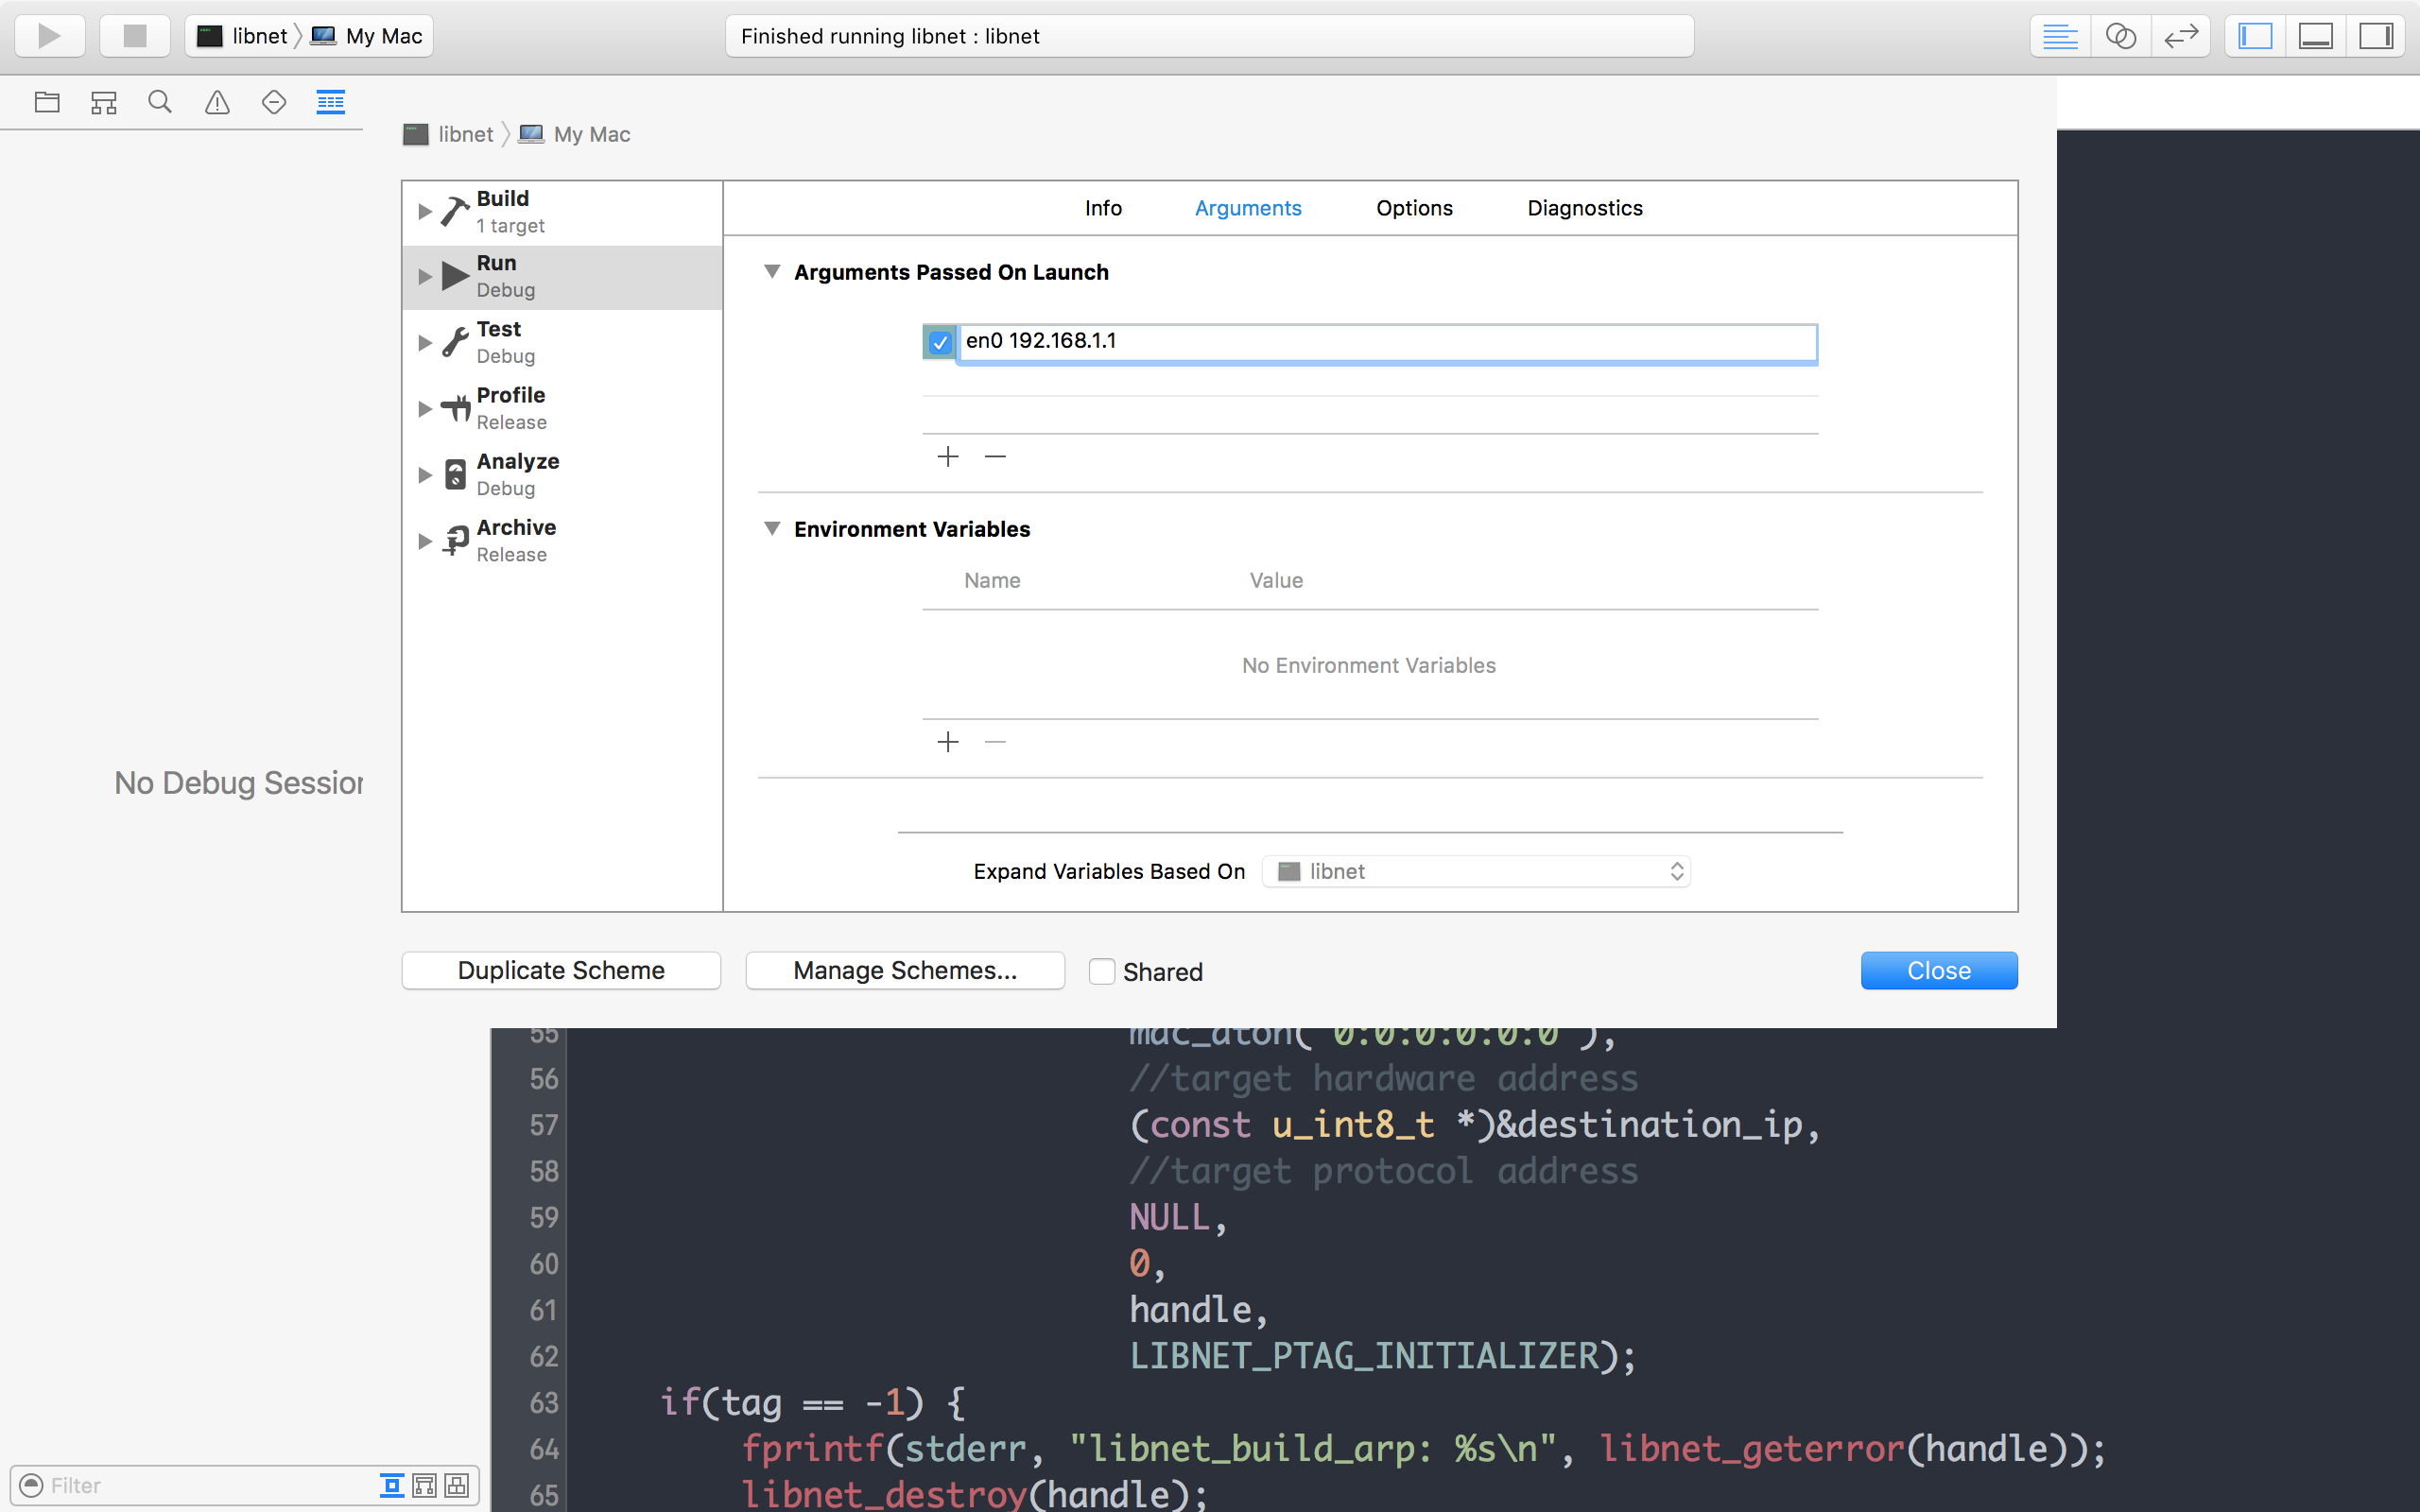
這個程式需要從命令列傳參數進去,在Xcode做法是左上角Scheme->Edit Scheme...。
 在
在Arguments Passed On Launch加入要傳入 的參數即可。
結果
libnet % ./send_an_arp_request
Usage: ./send_an_arp_request <Interface> <IP Address>
libnet % sudo ./send_an_arp_request en0 192.168.1.1
Sent: 42 bytes

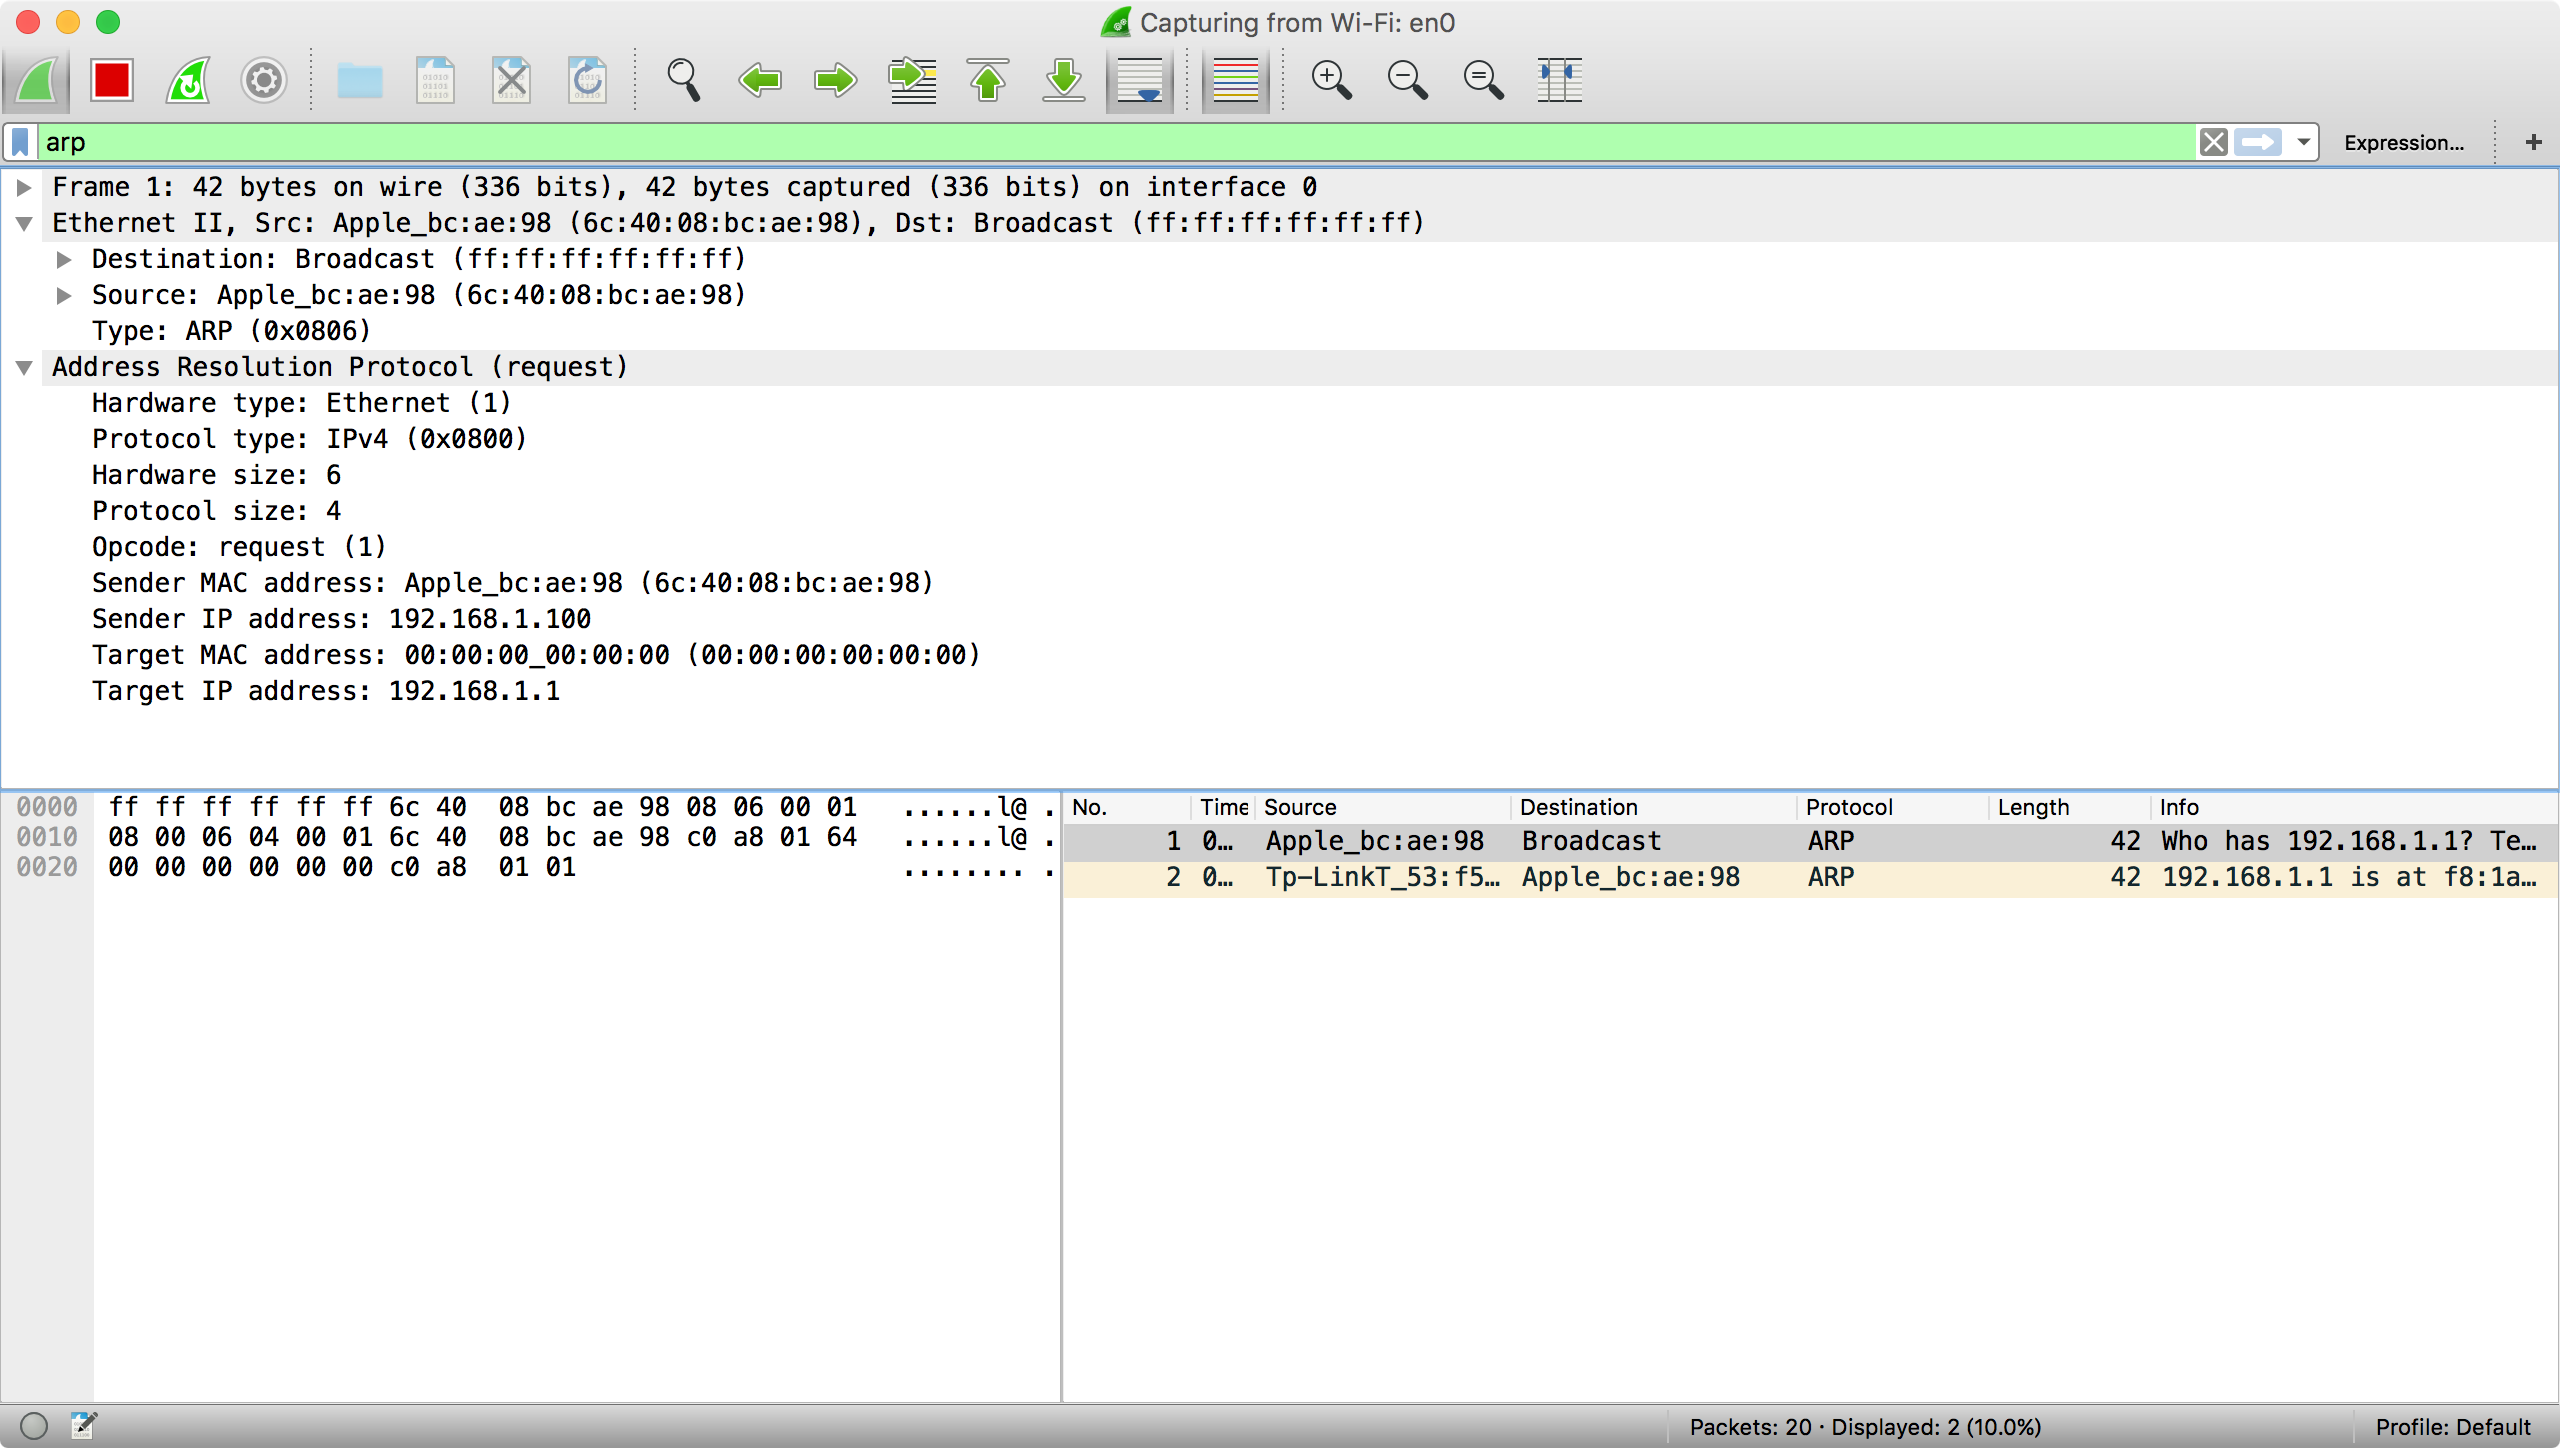
程式會從en0送出一個ARP Request封包,與指令arping一樣目標有上線的話就會回覆一個ARP Reply封包。
參數
Interface #選擇從哪個interface送出
IP Address #要查詢的IP Address
分析
u_int8_t *mac_aton(char *mac_address);
我們宣告一個函數mac_aton()負責將字串的MAC Address轉成網路封包可以用的格式,這函數主要是呼叫libnet_hex_aton()完成。
    if(argc != 3) {
        fprintf(stderr, "Usage: %s <Interface> <IP Address>\n", argv[0]);
        exit(1);
    }//end if
參數只能有2個,就是Interface和IP Address,所以包含自己argc一定要有3個。
    handle = libnet_init(LIBNET_LINK, argv[1], errbuf);
    if(!handle) {
        fprintf(stderr, "libnet_init: %s\n", errbuf);
        exit(1);
    }//end if
第一步就是呼叫函數libnet_init()初始化一個libnet handle,因為我們要寫ARP的封包,ARP屬於Data-link Layer與Network Layer之間的一個協定,所以要開啟LIBNET_LINK,第二個參數就是從指令列傳來的Interface。
    source_ip = libnet_get_ipaddr4(handle); // my ip address
    if(1 != inet_pton(AF_INET, argv[2], &destination_ip)) {
        fprintf(stderr, "Invalid IP address: %s", argv[2]);
        libnet_destroy(handle);
        exit(1);
    }//end if
接著就是要來先處理來源以及目的IP地址,因為我們想要送出一個能夠被正確回覆的ARP Request封包,所以來源IP地址呼叫函數libnet_get_ipaddr4()來取得自己的IP地址,目的IP地址則從指令列傳過來的IP地址,不過地址可能會輸入錯誤,所以必須判斷回傳值。
    tag = libnet_build_arp(ARPHRD_ETHER,
                           //hardware type, 1
                           ETHERTYPE_IP,
                           //protocol type, 0x0800
                           ETHER_ADDR_LEN,
                           //hardware length, 6
                           4,
                           //protocol length
                           ARPOP_REQUEST,
                           //arp operation, 1
                           (const u_int8_t *)libnet_get_hwaddr(handle),
                           //source hardware address, my mac address
                           (const u_int8_t *)&source_ip,
                           //source protocol address
                           mac_aton("0:0:0:0:0:0"),
                           //target hardware address
                           (const u_int8_t *)&destination_ip,
                           //target protocol address
                           NULL,
                           0,
                           handle,
                           LIBNET_PTAG_INITIALIZER);
    if(tag == -1) {
        fprintf(stderr, "libnet_build_arp: %s\n", libnet_geterror(handle));
        libnet_destroy(handle);
        exit(1);
    }//end if
首先呼叫函數libnet_build_arp()將對應欄位的資料填入,使用libnet時不必在意太多關於網路順序的問題。
這也是我認為容易造成初學的人搞混,因為分析封包需要轉換網路順序寫封包卻不用?
第六個參數要填入自己的MAC Address,所以呼叫函數libnet_get_hwaddr()來取得自己的MAC Address。第八個參數一般都是填入00:00:00:00:00:00,表示不知道卡號是多少。最後一項參數填入LIBNET_PTAG_INITIALIZER表示這是新的表頭,這個參數可以填入其他函數libnet_build_arp()傳回的tag值來修改當時的表頭欄位。
而LIBNET_PTAG_INITIALIZER實際上是一個#define的保留字,它代表0。
/*
 *  Libnet ptags are how we identify specific protocol blocks inside the
 *  list.
 */
typedef int32_t libnet_ptag_t;
#define LIBNET_PTAG_INITIALIZER         0
這邊可以直接呼叫函數
libnet_autobuild_arp()來減少前面四個參數以及payload跟tag一些參數,不過初學還是一步一步來。
    tag = libnet_build_ethernet(mac_aton("ff:ff:ff:ff:ff:ff"),
                                //destination mac address
                                (const u_int8_t *)libnet_get_hwaddr(handle),
                                //source mac address, my mac address
                                ETHERTYPE_ARP,
                                //type
                                NULL,
                                0,
                                handle,
                                LIBNET_PTAG_INITIALIZER);
    if(tag == -1) {
        fprintf(stderr, "libnet_build_ethernet: %s\n", libnet_geterror(handle));
        libnet_destroy(handle);
        exit(1);
    }//end if
然後就是Ethernet部分的表頭,呼叫函數libnet_build_ethernet(),目的MAC Addresss是廣播,來源MAC Address是自己的。
    length = libnet_write(handle);
    if(length == -1) {
        fprintf(stderr, "libnet_write: %s\n", libnet_geterror(handle));
    }//end if
    else {
        printf("Sent: %d byte%c\n", length, length <= 1 ? '\0' : 's');
    }//end else
然後就可以呼叫函數libnet_write()來送出封包了,函數成功會傳回送出幾個byte。
    //free
    libnet_destroy(handle);
最後一定要釋放資源。
結語
使用libnet送出封包簡單幾個函數就可以完成,少去了填寫欄位複雜的動作。可以修改這個程式來寫出一個ARPoison的攻擊程式。